Tag Archives: leftovers

Bacon and Cheese Frittata

16 Nov

Frittatas are quick and easy and delicious served for breakfast. lunch, and even dinner. By simply adjusting the add-ins, you can create a completely different taste experience that can fit almost any occasion. For this frittata, I used bacon, cheese, bell peppers, and onions, but I could have  just as easily used sausage, spinach, broccoli, or even ham. Just think quiche without a crust. Anything that sounds good in a quiche, would work here as well.

This dish is perfect to make for breakfast when having overnight company. It takes no time to whip up and tastes great even at room temperature!

I served our leftovers as the protein for a torta (See Chicken Torta for the recipe.) I put slices of the frittata on soft baguettes with sour cream, re-fried beans, and salsa. I also added slices of fresh avocado. Yum!

Bacon and Cheese Frittata

Servings: 6
Time: 35 minutes
Level: Easy

6 eggs
1 cup milk
2 tbsp. butter or margarine, melted
1/2 tsp. salt
1/4 tsp. pepper
1/4 c. bell peppers and onions, frozen and chopped
5 bacon strips, cooked and crumbled
1 c. shredded Cheddar cheese

In a bowl, beat eggs, milk, butter, salt, and pepper.

Pour into a greased 11×7 baking dish. Sprinkle with onions, bacon and cheese.

Bake, uncovered, at 350° for 25-30 minutes or until a knife inserted near the center comes out clean. Yum!

Tips
– Adjust the add-ins. Add any type of meat, cheese, or veggies for a different twist!

Chocolate Chip Cookie HEAVEN…

13 Jul

As you can tell, I hardly ever bake. If I bake, it’s for a purpose or a super random craving. I was reading a few blogs the other day, came across this recipe, and decided I HAD to try it. It calls for brown butter, which, until now, I had never attempted. I always see Giada tossing noodles in brown butter and she always makes it look sooo good! Since I’ve always wanted to try my hand at browning butter, I thought using it as an ingredient in a cookie batter, instead of as the star of a pasta dish, would be my best option. You know, in case I botched it.

As it turns out, browning butter is a cinch! All you do is heat it up and stir until it becomes fragrant and brownish in color.

These cookies are amazing. I really have nothing much to say other than that. They have a toffee flavor that is unmatched in any other chocolate chip cookie I’ve ever made. I baked a few and then I froze the rest of the pre-baked cookies to use another day.

They taunt me. Every time I open the freezer, there they are, calling to me. “Please bake me until I’m ooey and gooey. Couldn’t you go for a tall glass of milk right about now?” No cookie, EVER, has ever had a hold on me like these. If you don’t try them, good for you. Way to stay strong. Because I’m telling you, once you make these cookies, your life will forever be changed, and so might your pant size…

Kari, over at Culinarication, is responsible for  posting this recipe. She got the original recipe from America’s Test Kitchen but she tweaked it a little. Kari, I thank you and I curse you. Thank you for this ridiculously delicious cookie recipe but curse you for making me cookie addicted…

Light Chocolate Chip Cookies

(recipe adapted from America’s Test Kitchen and Kari from Culinarication)

Servings: 18 – 24
Time: 20 minutes
Level: Medium

1 1/4 c. all purpose flour

1/4 tsp. baking soda

1/4 tsp. salt

4 tbsp. unsalted butter

1 large egg

2 tsp. vanilla extract

1 c. packed light brown sugar

1/3 c.  chocolate chips

Set your oven rack to the middle position and set the temperature to 350°. Whisk the flour, baking soda, and salt together, and set aside. Mix the brown sugar, vanilla and egg together in a bowl. Over medium-low heat, melt and brown your butter. When it cools slightly, mix it into the sugar and butter mixture. Stir it until combined, and then let it sit for a few minutes. Repeat 1 or 2 times. Stir in the flour and chocolate chips. Portion the dough into 1-inch balls (a level tablespoon’s worth) and split them between two parchment lined baking sheets. Bake one sheet at a time for 9-11 minutes until centers are set.

Let them set on the sheet for 5 minutes, then remove to a wire rack to cool. Store any leftovers, if there are any, in an airtight container. These are best when eaten within a few days. Yum!

Tips
– Freeze the unused dough after portioning it (stick them on a plate for a few hours until hard, then store them in a freezer bag). When the cookie craving strikes, bake as many cookies as you want in a 350° oven for about 15 minutes or so, and then let them set for 5 minutes on the sheet. Fresh cookies, anytime you want them!


Grilled Corn with French Onion “Butter”

12 Jul

Grilled corn on the cob is probably my favorite summertime veggie. When the husks burn on the outside of the corn, the kernels practically get a steam bath and become infused with a wonderful smoky flavor. When I grill corn on the cob, I make sure to grill a lot of it! Leftovers can be reinvented into so many delicious dishes… the options are truly endless.

You can cut off the perfectly charred kernels to throw into a salad, use them to make a cold corn soup, (whew… recipe for another day, pure deliciousness!) make a salsa or dip, or even just reheat them with a little salt and butter for an easy side dish on a busy night.

Grilling corn is super easy. There are a lot of theories on how to grill the perfect ear of corn but this one seems to work best for me. Sorry there aren’t any pictures…

First, with kitchen scissors, I trim the silk fibers that are poking out of the top of the ear. Then, I peel off the first entire layer of the husk. After that, I throw the ears on to the grill, set at medium-high heat, for 25-30 minutes, turning every once in a while. Once they come off of the grill, totally black and super messy, I peel back the husk and take off the silk fibers. I guess that’s called shucking?! Ahhhhh-mazing!

Nothing can beat an ear of grilled corn slathered in melted butter and dusted with salt. But for the sake of not boring my family with the same ole’ side dish, just because I love it so much, I started doing some experimenting.

Normally I don’t have French onion dip in the fridge. Chip dip is just something I never buy. I’d rather use Greek yogurt and sour cream to make my own. I like controlling my own flavors and nutritional content when it comes to things like that. But, alas, the 4th of July left us with a tub and I figured I could use it. What was born was truly delicious and I hope you enjoy it.

Grilled Corn with French Onion “Butter”

Servings: 2
Time: 2 minutes
Level: Easy

2 ears of corn, grilled and shucked
2 tbsp. French onion dip (I used Dean’s brand)
1/4 tsp. cayenne pepper (or more…)
1/2 tsp. lime or lemon juice

Mix dip, cayenne, and juice together. Spread over all sides of the corn. Yum!

Tips
– I bet you could use any dip flavor… dill, ranch, etc.

Simple Sabroso Salsa

7 Jul

Sabroso means tasty in Spanish… I’m not sure if I used it in the right context or not, but hey, I only have a minor in the language so I’m not expected to know, right?

This salsa is called Sabroso Salsa because it is simply that, a tasty sauce… especially the next day, once all of the flavors sit and have a chance to mingle with each other.

If you have any leftover grilled corn, use it! If not, no worries! Canned corn will do just fine.

I served this salsa with tortilla chips but it would also be delicious served on crackers or bite sized baguette slices topped a little avocado and cheese. Appetizers, anyone?

Don’t forget to check the tips section for 2 great ideas for using up leftovers!

Simple Sabroso Salsa

Time: 5 minutes
Servings: A lot! It made about 3 -4 cups of salsa.
Level: Easy

1 can black beans, drained and rinsed
1 can whole kernel corn, drained and rinsed
1 can Rotel, drained
1 tbsp. jalapeños, diced
2 tsp. cumin
2 tsp. chili powder
1 tsp. garlic powder
1 tsp. salt
2 tsp. lime juice

Mix all ingredients together and let sit in the fridge until ready to serve. Yum!

Tips
– Play with the spices. You can add as little or as much of each as you’d like!
– I spooned leftover salsa over grilled chicken for dinner the next day. Yum!
– Another idea for leftovers!!!! I used the rest of the leftover salsa to make a simple pasta dish. I heated the salsa in the microwave and mixed it with cooked, drained pasta shell noodles and leftover shredded chicken. It was so yummy!!

Perfectly Roasted Chicken – Comfort Food At It’s Best!

29 Jun

Whew. What a looong weekend/week. After everything we’ve all been through, I thought we deserved a little R&R and a deliciously comforting meal. This roasted chicken takes about 10 minutes to prepare so it’s in the oven in no time. It also makes your entire house smell like a cozy diner on a winter’s day.

While it roasted away in the oven, I got in a load of laundry, took the dogs on a w-a-l-k, (can’t say it in front of them, ya know) and took a much deserved bath. This is my go-to recipe for roasted chicken and it delivers time after time. I hope you like it.

The two of us can typically get about 4-5 meals out of one chicken so buy them when they’re on sale and keep them in your freezer to roast later. You can also freeze the cooked meat. That’s what I did tonight. We ate the chicken legs for dinner and I froze a bag of the breasts and two bags of shredded meat. That will come in handy later on when I’m in a hurry and need to make a quesadilla or a quick casserole.

Perfectly Roasted Chicken

Servings: 8
Time: 1 hour and 30 minutes total
Level: Medium

1 whole chicken (3-4 lbs.), thawed
3 cloves garlic, smashed
1 onion, chopped
2 stalks celery, cut into thirds
1 Tbsp. margarine
2 Tbsp. canola oil
1 Tbsp. poultry seasoning
1 tsp. salt
1 tsp. pepper
1 tsp. chicken seasoning (such as Weber’s Kick’n Chicken)

Preheat oven to 400°. Remove innards from chicken. Dry off chicken, inside and out, with paper towels. Fill cavity with garlic, onions, celery, and margarine.

Rub outside of chicken with oil. Sprinkle seasonings all over. Tuck wings and tie legs together with kitchen twine, if desired.  Place any leftover onion or celery pieces in the bottom of a large cast iron skillet. Place chicken on top.

Roast in the oven, uncovered, for 1 hour and 15 minutes, or until a meat thermometer reads 180° when inserted into the thickest part of the breast. Remove from oven, let rest for at least 15 minutes, and serve. Yum!

Tips
– If you don’t have kitchen twine, you can use unwaxed and unflavored dental floss or upholstery thread.
– Instead of using chicken seasoning, use your favorite fresh herbs, like rosemary or thyme.

Chili Cheese Turkey Dogs

20 Jun

These are some serious knife and fork dogs. The spicy chili and grilled hot dog combo is a classic that simply can’t be beat.

I NEVER order these when I’m out because chili can be unpredictable and VERY VERY fatty. You never know what the consistency is going to be like and you can never tell what cut of meat has been used. I like my chili chunky. I want to be able to see the meat, beans, and tomatoes and taste them all individually if I wanted to. I know, I know… I’m such a weirdo.

This chili is not just good on hot dogs. It is also delicious when served alone, on top of Fritos or tortilla chips, topped with sour cream and cheese, or any combination of the three. An added bonus?! This chili recipe is quick and easy and only takes 15 minutes to make!

Speedy Spicy Chili

Servings: 4
Time: 15 minutes
Level: Easy

1/2 onion, chopped
1 clove garlic, minced
1/2 lb. ground turkey or ground beef
1 can chili ready tomatoes
1 can chili beans
1/4 c. jalapeños
1 tsp. chili powder
1/2 tsp. cumin

In a deep sauté  pan over medium-high heat, cook onions and garlic in a little oil until they become fragrant. Add meat and cook until no longer pink. Add remaining ingredients and continue to cook, stirring often, until chili reduces and becomes thick. Yum!

Grill hot dogs, place in warmed hot dog buns, and top with chili and shredded cheese. Yum!

Tips
– My dad likes to add mustard to the top of his chili dogs.
– Jason likes to add sour cream.
– You can use regular hot dogs instead of turkey dogs.
– You can also leave the meat out of the chili and use vegetarian hot dogs.

You Hate Leftovers? No Way… and Big Boy Burritos

18 Jun

I recently had an interesting conversation with a guy about leftovers. I am leftover obsessed and he was telling how much he absolutely HATES them. After talking  about soggy casseroles, spoonfuls of peas, and one bite of this and that thrown back on a plate and stuck in the microwave, I almost agreed with him. GAAARRRROSSS.

It occurred to me that whenever I use leftovers, I rarely ever eat them in exactly the same way. I always turn them in to something completely different, so instead of boringly eating the same meal, I just have half of the leg work done for me when beginning my next meal.

Case in point: Last night’s burritos. I call them Big Boy Burritos because they are almost too stuffed to fit into a tortilla. Good news? You don’t need any sides. All of your veggies and protein are wrapped up into one filling bundle. Yum!

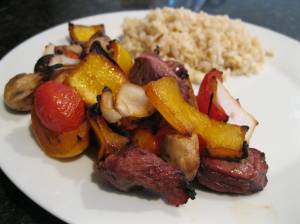
The day before I  made Steak and Veggie Kabobs and had a lot leftover. I made leftovers on purpose so I could have steak, veggies, and rice already done for a quick meal later. If you think ahead, you can make weeknight dinners a breeze for nights when you’re in a hurry.

Big Boy Burritos

Servings: However much you have leftover.
Time: 10 minutes, max
Level: Easy

Steak or chicken, cooked
Veggies, cooked
Salsa
Rice
Black Beans
Tortillas
Sour cream
Cheese, shredded

Slice meat and veggies into bite sized pieces.

In a skillet over medium heat, heat meat, veggies, a few spoonfuls of salsa, rice, and black beans until warmed throughout.

Microwave tortillas for 15 seconds to help them become more pliable. Top tortillas with desired amounts of salsa and sour cream. Top with warmed meat mixture and a little cheese. Wrap it up and you’re good to go! Yum!

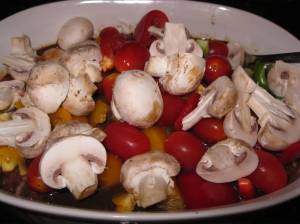
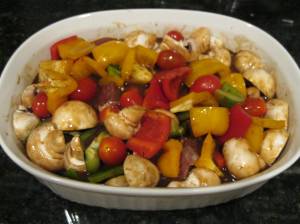
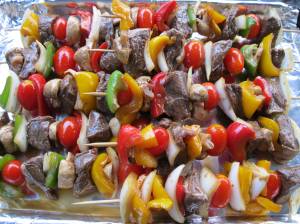
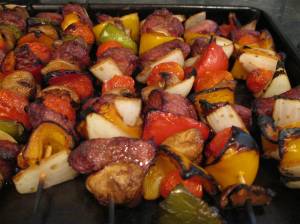
Steak and Veggie Kabobs

16 Jun

This marinade isn’t true to the original recipe because I couldn’t remember it exactly but comes from a great friend and amazing lasagna maker, Web. He made it for us a few weeks back and they were amazing!

Summertime screams “Turn on the Grill!” so that is just what we did. What better way to beat the 100° weather than to spend time outside over a fiery grill? Kidding… it always takes some convincing in this hot humidity to get the grill going in our house but tonight, it was well worth it.

This slideshow requires JavaScript.

Steak and Veggie Kabobs

Time: 24 hours… but seriously about 10-15 minutes to prepare
Servings: 4-6
Level: Easy

Marinade:
1 c. Zesty Italian dressing
1/2 c. Worcestershire
1/2 c. Dale’s Low Sodium Steak Seasoning (picture in slideshow)
2 cloves of garlic, minced

Kabobs:
1 1/2 lbs. chuck roast, or your favorite cut of beef… almost anything will do, cut into big bite sized pieces
1 yellow bell pepper, chopped into big bite sized pieces
1 green bell pepper, chopped into big bite sized pieces
1 red bell pepper, chopped into big bite sized pieces
1 onion, chopped into big bite sized pieces
1/2 pint cherry tomatoes
1/2 package white button mushrooms, cut in half, length wise

In a long dish, whisk marinade ingredients together. Add meat and veggies.

Toss to coat. Cover dish in plastic wrap and let sit overnight in the fridge, stirring once or twice throughout the day.

When ready to grill, thread meat and veggies on skewers.

Grill over medium heat for 10 minutes, turning often to ensure even grilling.

Yum!

Tips
– Serve with a side of brown rice.
– Skewer pineapple and grill for a sweet addition.
– Use leftovers to make steak fajitas.

Leftover Pre-baked Crescent Rolls? Make Dessert!

11 Jun

This slideshow requires JavaScript.

I had two triangles left over after making Peppered Gravy Pot Pie so I decided to make dessert. Why not? And what a treat! I NEVER make dessert. These would also be yummy for breakfast.

Cinnamon Pecan Crescents

Servings: 2 (But you could use the whole tube of crescents)
Time: 10 minutes
Level: Easy

Crescent Roll triangles
Cream Cheese
Cinnamon and Sugar (I always keep a small container of these two mixed together)
Pecans, chopped

Lay the crescent rolls out flat. On the wide end, spread cream cheese and top with cinnamon and sugar and a few pecans. Roll triangles up like regular crescent rolls.

Bake at 375° for 8 minutes. Yum!

Peppered Gravy Pot Pie

8 Jun

The inspiration for this recipe came from an ingredient I used yesterday. Peppered Gravy! I used it as the sauce for my Breakfast Pizza and I had a lot leftover. What to do… what to do?

In the fridge, I also had a tube of crescent rolls that needed to be used so I figured I could put the two together. Peppered gravy would have been delish poured over hamburger steak but I wasn’t in the mood.

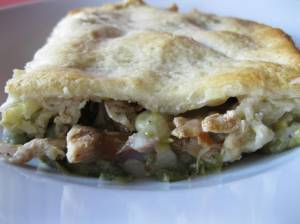
I grabbed a chicken breast and two cans of veggies from my pantry, and threw it all together for a seriously comforting and super quick dinner. Yum!

Peppered Gravy Pot Pie

Servings: 4-6
Time:  25 minutes
Level: EASY!

1 chicken breast
salt and pepper, to taste
1/2 c. peppered gravy, prepared according to packaged directions
1 can mixed vegetables, rinsed and drained
1 can diced potatoes, rinsed and drained
1 tube crescent rolls

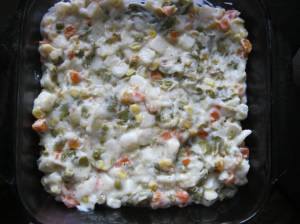
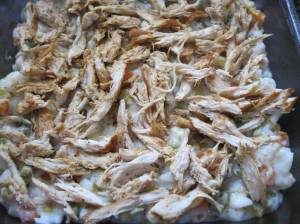
Preheat oven to 375°. In a pan over medium-high heat, cook chicken breast, seasoned with salt and pepper, until no longer pink. Shred chicken using two forks. In a bowl, mix together peppered gravy and vegetables. Pour vegetables into a glass baking dish and top with shredded chicken.

Roll out crescent rolls and place, flat, on top of dish. Bake for 20-25 minutes, or until crescent roll top is golden brown. Yum!

Tips
You might not use the entire roll of crescents. If not, stay tuned for what I did with my leftover rolls!!
– I topped my portion with a little hot sauce.
– If you don’t have peppered gravy, you could always use a can of cream of chicken or cream of mushroom soup mixed with a little milk or liquid stock.