Archive | What’s for Dessert? RSS feed for this section

Cake Mix Cookies… Perfect for Summer and only 4 ingredients!

29 Mar

These cookies have been around my family for ages. They are easy to make, they look great, and they taste fantastic. You can choose to make lemon, strawberry, or orange cookies and all you have to change is the cake mix! I’ve tried this recipe with a chocolate cake mix and was not impressed with the results so I’d stick to more fruit flavors if I were you.

I decided to make lemon cookies this go around because we were eating BBQ for dinner and I thought lemon would compliment the tangy BBQ sauce perfectly. Delicious as always!

Cake Mix Cookies

Servings: 45ish cookies
Level: EASY!
Time: 20 minutes

1 box cake mix (lemon, strawberry, or orange)
1 8 oz. tub of cool whip
1 egg
powdered sugar for rolling

Preheat oven to 350°. Mix first 3 ingredients.

Dough will be sticky. Refrigerate for a few minutes if it is too sticky to work with. Roll spoonfuls of dough into 1/2 inch balls and roll balls in powdered sugar to coat.

Place on a greased cookie sheet and bake 10-12 minutes, or until barely browned along the edges.

Cool on a wire cooling rack. Yum!

Tips
– I put misshapen blobs of dough into powdered sugar and roll them into a ball while rolling them in the sugar. This sometimes helps tame the stickiness.

Flourless Peanut Butter Chocolate Chip (optional) Cookies – 3-4 Ingredients!

21 Dec

So there you are, running around your house like crazy doing last minute things to get ready for Christmas. You’re cleaning the house from top to bottom, figuring out how to wrap insanely shaped gifts, and washing linens for expected guests when there is a knock at your door. A sweet neighbor has brought you a gift, and there you are, with nothing to reciprocate.

Nice gesture. But now what? Insert my Flourless Peanut Butter Chocolate Chip Cookies. They are so easy to make, and with only 4 ingredients, you won’t be adding a trip to the grocery store to your to-do list. Plus they look great! The batter is nice and thick so the cookies stay plump and round, perfect for wrapping up and gifting.

I hope you enjoy these. We make them around our house when a cookie craving strikes late at night. They are perfect paired with an ice cold glass of milk or an ice cold White Russian. Yum!

Flourless Peanut Butter Chocolate Chip Cookies

Time: 20 minutes
Level: Easy
Servings: ~20 cookies

1 c. creamy peanut butter
1 c. sugar
1 egg
1/3 c. chocolate chips, optional

Continue reading

Sour Cream Coconut Layer Cake – A Tribute to Grandmother

20 Nov

This is one of my grandfather’s favorite cakes. Last time I went to visit, he mentioned he had a “hankerin'” and I thought I would make it for him for Christmas but my grandmother passed away on Tuesday and so I decided to make it now.

My grandmother was the most amazing woman and cook of all time. Some of my very first and fondest memories with Grandmother include cooking together. She would let me do anything…even if it meant spending more time on clean up than cooking. Whether it be rolling out sausage balls or biscuits waaay too big or small, putting too much real sugar in boiling oatmeal, or making messy mud pies in the back yard, if I was with her, she was letting me find my way.

To this day, I’ve never in my life had better chicken and dumplings, butter beans, or anything else, for that matter. You know how people say things taste better when they are made with love? She showed her love through cooking. We all felt it. In fact, showing love through cooking is definitely something she passed down to all of her daughters. My mom and aunts are great in the kitchen and have, in turn, passed it down to all of us.

Although Grandmother is no longer with us, the memories we have will live on forever.

I love you.

This coconut cake takes 3 days to set in the fridge so don’t make it if you are in a hurry. Patience is a virtue with this one. The longer it is left to set up, the better and moister it becomes. It turns out absolutely gorgeous.  I hope you enjoy it as much as PawPaw. Yum!

Sour Cream Coconut Layer Cake

Servings: A Zillion
Level: Easy/Medium
Time: 1 hour + 3 days to set in the fridge

1 package (18½ oz.) butter flavor cake mix
2 cups sugar
1 carton (8 oz.) commercial sour cream
1 package (12 oz.) frozen coconut, thawed (unfrozen from the baking aisle works, too)
1½ cups whipped cream (thawed)

Prepare the cake according to directions, making two 8-inch layers.

Split both layers horizontally after they have cooled. Blend together the sugar, sour cream, and coconut, and chill. Spread all but 1 cup of the sour cream mixture between the four layers. Blend the remaining cup of the mixture with the whipped cream and spread on the top and sides of the cake. Seal in an airtight container and refrigerate for three days before serving. Keep refrigerated after cutting. Yum!


(This is what happens when you cut into it with a butter knife instead of a sharper one… whoops!)

Tips
-Duncan Hines butter flavor cake mix works VERY well with this recipe.
-Sprinkle any extra coconut over the iced cake to hide any icing imperfections!
-Make the sour cream mixture and put it in the fridge to cool while the cakes are baking/cooling. This will help the mixture thicken up so it won’t ooze out from under the layers.

Banana Oatmeal Granola Bar Bite Cookies… Butterless, Flourless, Eggless, and No Added Sugar. So What’s In There?

20 Aug

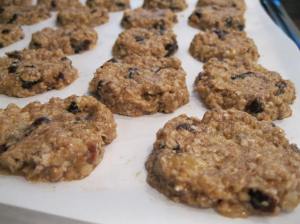
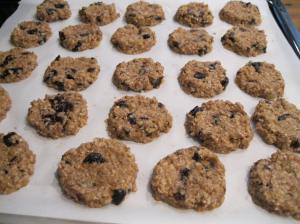
These granola bar bites have ever so eloquently been dubbed “old people cookies” because of their ingredients. But take them seriously because they are VERY yummy! I like to make these little bites to eat for breakfast, as a post work out snack, or as a mid-day pick-me-up. They pack well and can be made into various shapes such as round cookies, square cookies, or bars.

They are super healthy and kids LOVE them. You won’t believe these vegan goodies are made without butter, flour, eggs, or added sugar! The bananas and dried fruit add lots of texture and sweetness so enjoy!

Banana Oatmeal Granola Bar Bite Cookies

Serving: 24 cookies
Time: 35 minutes
Level: Easy (super kid friendly, so let them help!)

3 ripe bananas (wait until they are nice and spotty. They are sweeter that way.)
2 c. oats (you can use whole wheat, steel cut, quick cooking, or most any other type of oats)
1/2 – 1 c. dried fruit, chopped (I used prunes but apricots and cranberries work well, too)
1/3 c. coconut oil (you can use vegetable oil)
1/2 c. nuts, chopped (optional)
1 tsp. cinnamon
1 tsp. vanilla

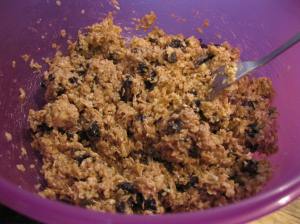
In a medium bowl, mash bananas with a fork until smooth. Stir in remaining ingredients. Preheat oven to 350°. Let mixture sit on the counter for 15 minutes.

On a parchment paper lined baking sheet, drop mixture by spoonfuls. With your hands, shape cookies into desired shape and press down until flattened to desired thickness. (Cookies will come out of the oven in the exact same shape they went in…) Bake for 20 minutes. Yum!

Tips
– Don’t forget to use parchment paper. The bananas and dried fruit will leave a sticky residue on your baking sheet if you don’t!

Hawaiian Pineapple Pie

25 Jul

Pineapple is so refreshing! Especially in the summertime. This pie is an absolute breeze to make… and since it’s a no-bake pie, the oven never has to come on! I recently made this pie with a group of 2nd and 3rd graders who each made their very own, crust and all!

You can use a pre-made graham cracker crust or simply make your own. Enjoy!


Hawaiian Pineapple Pie

Servings: 6-8
Time: 5 min. to make… 2 hrs. to chill
Level: Kid-friendly

1 can crushed pineapple, undrained
1 large box instant vanilla pudding
1 c. sour cream
1 graham cracker pie crust (or make your own, see recipe below)

In a medium sized bowl, mix together crushed pineapple with juice, pudding mix, and sour cream. Pour into pie crust. Refrigerate for at least 2 hours before serving. Yum!

Graham Cracker Crust

1 sleeve graham crackers (about 9 long crackers)
1/4 c. sugar
5 tbsp. butter, melted

Finely crush crackers. Add sugar and butter. Press into a pie plate with finger tips. Yum!

Tips
– I put the crackers in a zip loc bag and use the full pineapple can to roll across the bag.

Chocolate Chip Cookie HEAVEN…

13 Jul

As you can tell, I hardly ever bake. If I bake, it’s for a purpose or a super random craving. I was reading a few blogs the other day, came across this recipe, and decided I HAD to try it. It calls for brown butter, which, until now, I had never attempted. I always see Giada tossing noodles in brown butter and she always makes it look sooo good! Since I’ve always wanted to try my hand at browning butter, I thought using it as an ingredient in a cookie batter, instead of as the star of a pasta dish, would be my best option. You know, in case I botched it.

As it turns out, browning butter is a cinch! All you do is heat it up and stir until it becomes fragrant and brownish in color.

These cookies are amazing. I really have nothing much to say other than that. They have a toffee flavor that is unmatched in any other chocolate chip cookie I’ve ever made. I baked a few and then I froze the rest of the pre-baked cookies to use another day.

They taunt me. Every time I open the freezer, there they are, calling to me. “Please bake me until I’m ooey and gooey. Couldn’t you go for a tall glass of milk right about now?” No cookie, EVER, has ever had a hold on me like these. If you don’t try them, good for you. Way to stay strong. Because I’m telling you, once you make these cookies, your life will forever be changed, and so might your pant size…

Kari, over at Culinarication, is responsible for  posting this recipe. She got the original recipe from America’s Test Kitchen but she tweaked it a little. Kari, I thank you and I curse you. Thank you for this ridiculously delicious cookie recipe but curse you for making me cookie addicted…

Light Chocolate Chip Cookies

(recipe adapted from America’s Test Kitchen and Kari from Culinarication)

Servings: 18 – 24
Time: 20 minutes
Level: Medium

1 1/4 c. all purpose flour

1/4 tsp. baking soda

1/4 tsp. salt

4 tbsp. unsalted butter

1 large egg

2 tsp. vanilla extract

1 c. packed light brown sugar

1/3 c.  chocolate chips

Set your oven rack to the middle position and set the temperature to 350°. Whisk the flour, baking soda, and salt together, and set aside. Mix the brown sugar, vanilla and egg together in a bowl. Over medium-low heat, melt and brown your butter. When it cools slightly, mix it into the sugar and butter mixture. Stir it until combined, and then let it sit for a few minutes. Repeat 1 or 2 times. Stir in the flour and chocolate chips. Portion the dough into 1-inch balls (a level tablespoon’s worth) and split them between two parchment lined baking sheets. Bake one sheet at a time for 9-11 minutes until centers are set.

Let them set on the sheet for 5 minutes, then remove to a wire rack to cool. Store any leftovers, if there are any, in an airtight container. These are best when eaten within a few days. Yum!

Tips
– Freeze the unused dough after portioning it (stick them on a plate for a few hours until hard, then store them in a freezer bag). When the cookie craving strikes, bake as many cookies as you want in a 350° oven for about 15 minutes or so, and then let them set for 5 minutes on the sheet. Fresh cookies, anytime you want them!


I Love Birthday Cake… Box or Not

13 Jun

Mr. Pantry Chef had a birthday!!! Although this delicious little carrot cake came straight out of a box, I still added eggs and oil, mixed it up, baked it, and frosted it. It’s the thought that counts. Right?

Crushed pecans added a nice crunch. I put wax paper under the sides and made a royal mess getting them on there but once the paper, full of excess pecans, was removed, it turned out pretty.

Happy Birthday to my greatest love. I can’t believe it has been an entire year already. Didn’t we just celebrate? The older you get, the faster the years go by. Thankfully, these fast moving years have been full of complete joy and happiness.

Yum!

Leftover Pre-baked Crescent Rolls? Make Dessert!

11 Jun

This slideshow requires JavaScript.

I had two triangles left over after making Peppered Gravy Pot Pie so I decided to make dessert. Why not? And what a treat! I NEVER make dessert. These would also be yummy for breakfast.

Cinnamon Pecan Crescents

Servings: 2 (But you could use the whole tube of crescents)
Time: 10 minutes
Level: Easy

Crescent Roll triangles
Cream Cheese
Cinnamon and Sugar (I always keep a small container of these two mixed together)
Pecans, chopped

Lay the crescent rolls out flat. On the wide end, spread cream cheese and top with cinnamon and sugar and a few pecans. Roll triangles up like regular crescent rolls.

Bake at 375° for 8 minutes. Yum!

Quick and Easy Oatmeal Raisin Cookies – Butterless, too!

26 Apr

My mom substituted quick cooking oats for instant packets of brown sugar oatmeal once and the results were magnificent. I was totally, 100% inspired by her delicious cookies when I was coming up with this one. I looked around at a few cookie recipes, saw what they all had in common, combined one or two things here and there, and substituted a few ingredients with  instant packets of oatmeal and applesauce.

This recipe, although it contains brown sugar, is decently healthy for you, considering the health benefits that are in most cookies.

This recipe doesn’t make a lot of cookies, mine made 8. But isn’t that just the perfect amount? Now I won’t have cookies staring me in the face every time I go into the kitchen. If I did, my waistline would hate me because I wouldn’t be able to stay away from them!

These cookies turned out very dense and chewy, but still tasted great! They sort of had the consistency of granola bars, which I really enjoyed. It was a nice change from a regular cookie.

Quick and Easy Oatmeal Raisin Cookies

Servings: 8 cookies
Time: 15 minutes
Level: Easy

2 packets of Brown Sugar and Maple Instant Oatmeal (I used the Weight Control kind from Quaker’s)
1 egg
1/4 c. applesauce
1/4 c. brown sugar
1/4 c. all-purpose flour
1/2 tsp. vanilla extract
handful of raisins, optional
handful of chopped nuts, optional

Preheat oven to 350°. Mix all ingredients together.

Drop by spoonfuls onto a parchment paper lined baking sheet.

Bake for 10-15 minutes, until edges begin to brown. Yum!

Tips
– You can use 1/4 c. unsalted butter in place of the applesauce.
– Try using different flavors of instant oatmeal and different fruits.

Creme Brulee

12 Mar

My mother-in-law, Kim, made a delicious dinner for us tonight. She made pork loin, asparagus, smashed potatoes, tomatoes, and crescent rolls. Yum! But the icing on the cake, so to say, was the dessert.

Making creme brulee turned out to be quite an adventure. First of all, you are supposed to refrigerate the dish overnight before you serve it. Seriously? Who can make a dessert and just stare at it for days? No way. Not us. We made it (well… Mrs. Kim made it), we ate it. And let me tell you, it was gooooooood.

The adventure continued when we needed to torch the sugar on top. My sister-in-law’s boyfriend, Raul, turned on the torch, began torching the sugar, and quickly went up in flames. That’s right, his entire arm was set ablaze. We’re talking flames to the ceiling… He’s totally fine but man, looking back on it, I sure wish I had a picture. I was standing there with my camera on him when it happened. All I would have had to do is push the button. But, my fight or flight kicked in and I took off. Too bad.

This dessert is worth it. It’s worth the time, the effort, the risk of burning yourself or your house down, and the extra miles you’ll have to run after indulging.

Creme Brulee

Time: 1 – 1/2 hours
Level: Medium to difficult
Servings: 4

2 c. heavy cream
5 egg yolks
1/2 c. sugar
1 tbsp. vanilla extract
1/2 c. or so of light brown sugar

Preheat oven to 275°. Whisk the cream, egg yolks, sugar, and vanilla together in a bowl. Pour the mixture either into individual ramekins or a small casserole dish. Place the ramekins or casserole dish in a larger casserole dish. Pour hot water into the dish until it reaches half way up side of the ramekins or  smaller dish, creating a water bath. Put in the oven for 45 minutes. After 45 minutes, check every 10 minutes. Creme brulee is done when you can stick a knife in the middle and it comes out clean.

Remove the ramekins or smaller casserole dish from the water bath. Set them n the counter to cool, about 15 minutes. Put them in the fridge to chill overnight. (We skipped this step, but it probably would have been a good idea) When ready to serve, sprinkle a thin layer of brown sugar on top.

Torch the top or place the dish under the broiler for 1 minute.

Yum!